Cherry-handler is designed for AJAX queries creation and managing. Automates process with nonce check, user role (capability), public AJAX. Also allows to send data for server processing and receive them back.
Every module initialization call creates its query with preset parameters. Operation procedure can be divided into 2 parts:
- query initialization (registration). This part is carried out on the back-end
- instance initialization in public front-end or admin front-end js scripts
Handler parameters:
id- unique handler ID (AJAX query). To avoid problems use various prefixes and numbers during generating the IDs. ID is used for binding back-end and front-end handlersaction- wp-action name, handler creates an action by addingwp_ajax_andwp_ajax_nopriv_for the set name. Action name can be the same with ID. Action value is used for generating unique noncecapability- user role wrapper for current_user_can() wp functionis_public- defines whether to create an action withwp_ajax_nopriv_prefix for public front-end (false by default)callback- function that can be done after all checks. The callback can return void result. It can be done via echo or return, but the answer will be generated in json format. The result is located in Data property.type- query type (post by default)sys_messages- system messages arrayinvalid_base_data- server error or nonce field is emptyno_right- no user rightinvalid_nonce- nonce validation erroraccess_is_allowed- access is allowedwait_processing- previous query processing message
Initialization example:
$sys_messages = array(
	'invalid_base_data' => esc_html__( 'Unable to process the request without nonche or server error', 'text-domain' ),
	'no_right'          => esc_html__( 'No right for this action', 'text-domain' ),
	'invalid_nonce'     => esc_html__( 'Stop CHEATING!!!', 'text-domain' ),
	'access_is_allowed' => esc_html__( 'Access is allowed','text-domain' ),
	'wait_processing'   => esc_html__( 'Please wait, processing the previous request', 'text-domain' ),
);

$options_ajax_handler = get_core()->init_module(
	'cherry-handler', array(
		'id'           => 'cherry_save_options_ajax',
		'action'       => 'cherry_save_options_ajax',
		'capability'   => 'manage_options',
		'callback'     => array( $this , 'cherry_save_options' ),
		'sys_messages' => $sys_messages,
		)
);
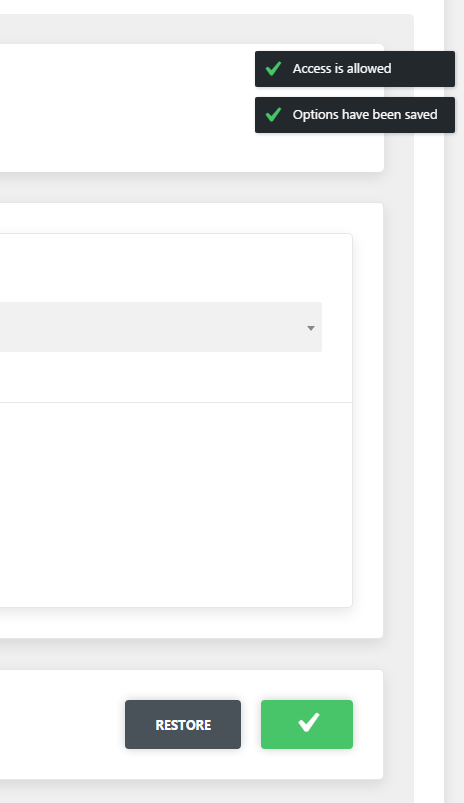
Note: If you set an empty line in a message, the notice will not be displayed. For example: If you don’t need an "Access is allowed" message, leave this field empty during handler initialization.
Initialization example:
saveOptionsInstance = new CherryJsCore.CherryAjaxHandler( /* object with parameters */ );
If CherryAjaxHandler is unavailable, handler can be initialized with CherryHandlerInit event:
$( document ).on( 'CherryHandlerInit', this.init );
Or add cherry-handler-js when adding your script in dependencies:
wp_enqueue_script(
	'your-script-handle',
	get_template_directory_uri() . '/assets/admin/js/script.js',
	array( 'cherry-js-core, cherry-handler-js' ),
	1.0.0,
	true
);
Handler js parameters:
handlerId- when checking the global area of js variables, you will see a variable with the name you’ve set during initializing the handler to a back-end.cache- if set to false the browser will not cache the query. It will also add the line_=[TIMESTAMP]в URL. (false by default)processData- by default all send to server data will be transformed into line in url-format (fName1=value1&fName2=value2&...) relevant toapplication/x-www-form-urlencoded. If you need to send data that can’t be processed in the mentioned way (for example DOM-document), you should disable processData option. (true by default)url- this parameter automatically defines the module, but you can set it manuallybeforeSendCallback- custom-function on ajax before send requesterrorCallback- custom-function on ajax error eventsuccessCallback- custom-function on ajax success eventcompleteCallback- custom-function on ajax complete event
After js handler initialization the following methods are available:
send- formats AJAX query after all necessary checks. Each query processing stage comes with system messages. Launch method in any event whether it is click or scroll, for instance:sendData- formats AJAX query and sets data in your custom callback. Wrapping-function for send methodsdata- data for sending
sendFormData- signs the form and sends to your custom callbackformId- unique form ID (form tag attribute)
Example:
( function( $, CherryJsCore ) {
	'use strict';
	CherryJsCore.utilites.namespace('cherryPopupsBackScripts');
	CherryJsCore.cherryPopupsBackScripts = {
		saveHandlerId: 'cherry_save_options_ajax',
		setAsDefaultHandlerId: 'cherry_set_as_default_options_ajax',
		resetHandlerId: 'cherry_restore_options_ajax',
		saveButtonId: '#cherry-popups-save-options',
		resetButtonId: '#cherry-popups-restore-options',
		formId: '#cherry-popups-options-form',
		saveOptionsInstance: null,
		resetOptionsInstance: null,
		cherryHadlerInit: function () {
			// Add function to the event CherryHandlerInit
			$( document ).on( 'CherryHandlerInit', this.init.bind( this ) );
		},
		init: function () {
			// Initialize handlers here, set unique id and necessary callbacks
			this.saveOptionsInstance = new CherryJsCore.CherryAjaxHandler({
				handlerId: this.saveHandlerId,
				successCallback: this.saveSuccessCallback.bind( this )
			});
			this.resetOptionsInstance = new CherryJsCore.CherryAjaxHandler({
				handlerId: this.resetHandlerId,
				successCallback: this.restoreSuccessCallback.bind( this )
			});
			this.addEvents();
		},
		addEvents: function () {
			$( 'body' )
				.on( 'click', this.saveButtonId, this.saveOptionsHandler.bind( this ) )
				.on( 'click', this.resetButtonId, this.resetOptionsHandler.bind( this ) );
		},
		saveOptionsHandler: function( event ) {
			// Call method  sendFormData of the sample saveOptionsInstance, initialized above
			this.saveOptionsInstance.sendFormData( this.formId );
		},
		resetOptionsHandler: function( event ) {
			// Call method send of the sample resetOptionsInstance, initialized above
			this.resetOptionsInstance.send();
		},
		saveSuccessCallback: function() {
			CherryJsCore.cherryHandlerUtils.noticeCreate( 'success-notice', cherryPopupnSettings.save_message );
		},
		restoreSuccessCallback: function() {
			CherryJsCore.cherryHandlerUtils.noticeCreate( 'success-notice', cherryPopupnSettings.restore_message );
				setTimeout( function() {
				window.location.href = cherryPopupnSettings.redirect_url;
			}, 500 );
		}
	}

	CherryJsCore.cherryPopupsBackScripts.cherryHadlerInit();

} ( jQuery, window.CherryJsCore ) );
Data sent to the custom callback are available in the global array with "data" clue.
if ( ! empty( $_REQUEST['data'] ) ) {
	$data = $_REQUEST['data'];
}
The module allows to display system messages on the admin front-end, for that you need to call js method:
CherryJsCore.cherryHandlerUtils.noticeCreate( 'success-notice', 'Save options' );
noticeCreate method takes parameters:
type- message type (success-notice, info-notice, error-notice) success-notice by defaultmessage- message text
Example: